
"I make my lampshades in a somewhat traditional fashion using styrene lining, steel frames and paper tape, however where I depart from traditional shade making is that I mount the shade liner with photographic mediums (such as transparencies, canvas or paper) versus fabric, then bind the print to the shade using a special adhesive and sometimes trimming it with archival PH neutral hinging tape (also used in book binding and art framing) *that's what I'm doing in the photo that i refer to as finishing touches :)* i particularly like printing onto/using duratrans (a highly durable transparency medium made by kodak) because it's designed to be backlit, is easy to clean and it's nice & bright! "
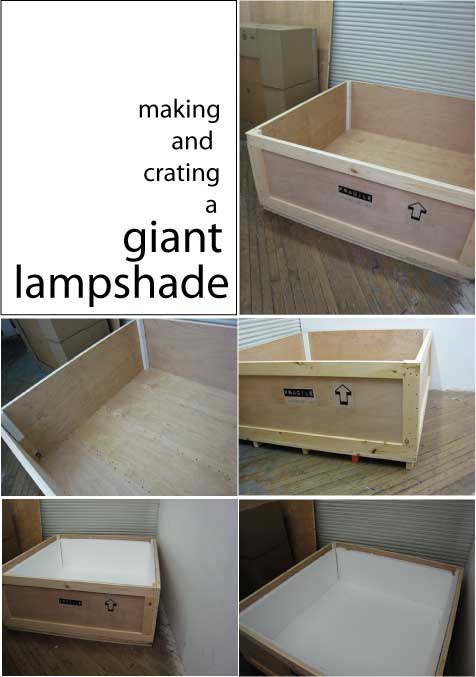 First you make a crate! A 65” x 65” x 30” wooden crate is constructed out of ½” plywood (luan), with a pallet built into the crate, to safely transport the giant lampshade to across the country from Brooklyn, NY to Santa Rosa, California. The crate is lined with 2" styrofoam sheets to protect the walls, and a 2nd layer on the bottom for extra protection for the diffuser.
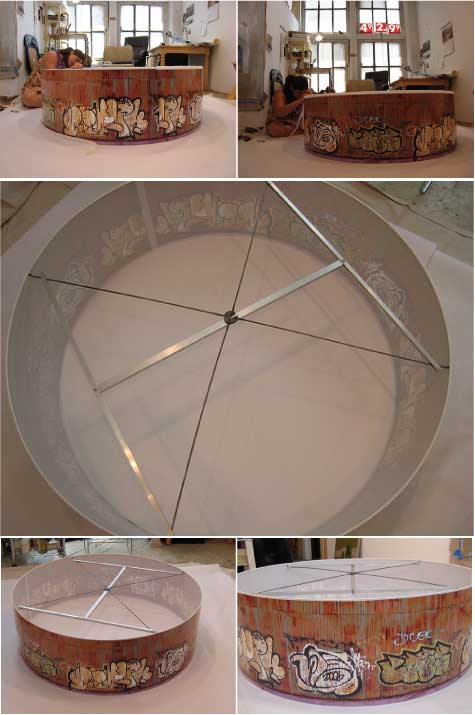 Here I am making the finishing touches. the shade itself is: 48” dia x 48” dia x 15” tall. The support structure was designed to be hardwired onto the fixture, then the shade is slipped onto the "H" shape and secured with screws (much easier than hardwiring a washer top ring) this helps decrease the likelihood of the shade being damaged during installation, and
helps distribute the weight more evenly. All done. time to pack her up!
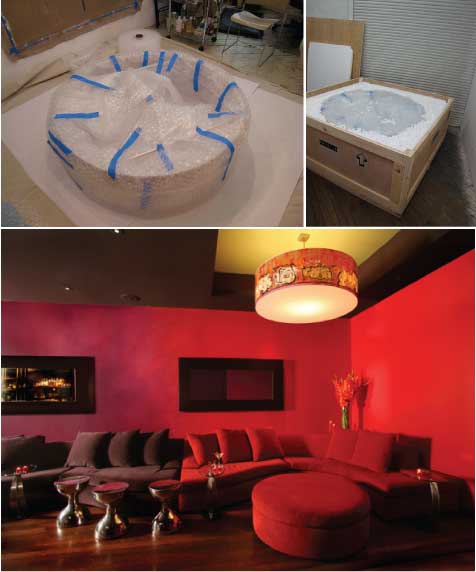 First I wrapped the shade carefully in a plastic drop cloth, then 2 layers of bubble wrap. The blue tape is used so they can safely and easily remove it during installation. Then the shade is placed inside the crate, loosely surrounded by peanuts. Next I covered with more foam, and sealed the crate. ...and off she goes!!
STIR COCKTAIL LOUNGE
404 Mendocino Avenue, Santa Rosa, CA 95406
Susan Diana Harris Interior Design, susandianaharris.com
Frankie Norstra Photography, frankienorstad.com
Lampshade by Re-surface
RE-SURFACE.net


2 comments:
love seeing the process and really love the shade.
What a fabulous shade! WTG Donna!!
Post a Comment