Hi There! It's Daniel and Valeria from Hindsvik Shop with our weekly Tuesday guest post! We're always finding vintage home decor pieces to stock in our shop and have recently encountered some great vintage fabric that we wanted to use in our own home! And what better way than in pillow form!
Today we'll be showing you how to make a "No-Sew" pillow with vintage (or any) fabric in 8 easy steps!


Here's what you'll need:
-Pillow Cushion
-Fabric (lightweight fabrics and cottons work best)
-Scissors
-Fusible Bonding Tape
-Adhesive Velcro
-Iron

Measure your cushion and cut fabric leaving at least 2 inches extra on each side. To make things easier, cut only one piece instead of two squares.
 Place the fabric right side up and fold over to middle. Cut two strips of Fusible Bonding Tape to the length of the top and bottom as shown.
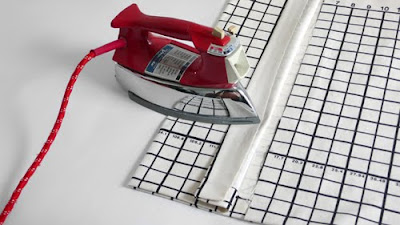
 Place Fusible Bonding Tape on the top of the inside piece (paper side up!) and iron for 1-2 seconds.
 Let cool and peel off paper leaving sticky film on fabric. Fold fabric back over to middle and iron spot once more, this time ironing for 7-8 seconds or until ends are sealed together. Repeat this process with the top.
 Remove the cushion. With fabric/pillow right side up, fold the open end in towards the middle while making sure the frayed ends are folded towards the inside. Since this is the outside of the pillow, you want any frayed ends on the inside.
Add Fusible Bonding Tape to the inside like before until pillow is sealed all the way around except an opening in the middle. This is where you'll create a velcro opening for your cushion!
Create a hem for your opening by placing Fusible Bonding Tape on the inside of the lip, ironing for 2-3 seconds, then peeling off the paper.
 Place Adhesive Velcro on the inside of the hemmed opening and on bottom piece. Press each until they stick firmly to fabric.
Now insert the cushion and you've got yourself an easy, "No-Sew" pillow that anyone can make! Once you know how to use the ironing technique, the possibilities are endless with what you can create! Pillows, curtains and home textiles with any design! You can also easy add embellishments, trim or ribbon with this iron-on method!
Happy Crafting and we'll see you next Tuesday!


11 comments:
This is so helpful. Thanks!
This is a great step by step that anyone can do. The photos are really helpful.
Wonderful! I must try this!
C U next tuesday, haahahaha.
Oh, anonymous....it made me smile too. ;)
Daniel and Valeria, I'm definitely going to give this a shot. Love it!
what's wrong with sewing?
Anon - : ) um nothing, unless you don't own a sewing machine, maybe?
thanks for the clear instructions - great project! i'm looking for a good pressing iron - do you like yours, and if so what brand is it?
Hi Shirlotta!
It's a vintage iron and the brand name is Vornado. Hope that helps :)
Thanks for these instructions. I'm not a sewer but have just moved and need a few cushions to liven up my decor. I'm adding a link to this from my own site.
Great tutorial for sure! I just had to link this to my no sew pillows post too, great project!
Post a Comment