

Do you ever buy a product that comes in a box so great that you hold on to it because it might be useful for something else? If yes, you will love this, if no, this might inspire you to hoard a little bit.
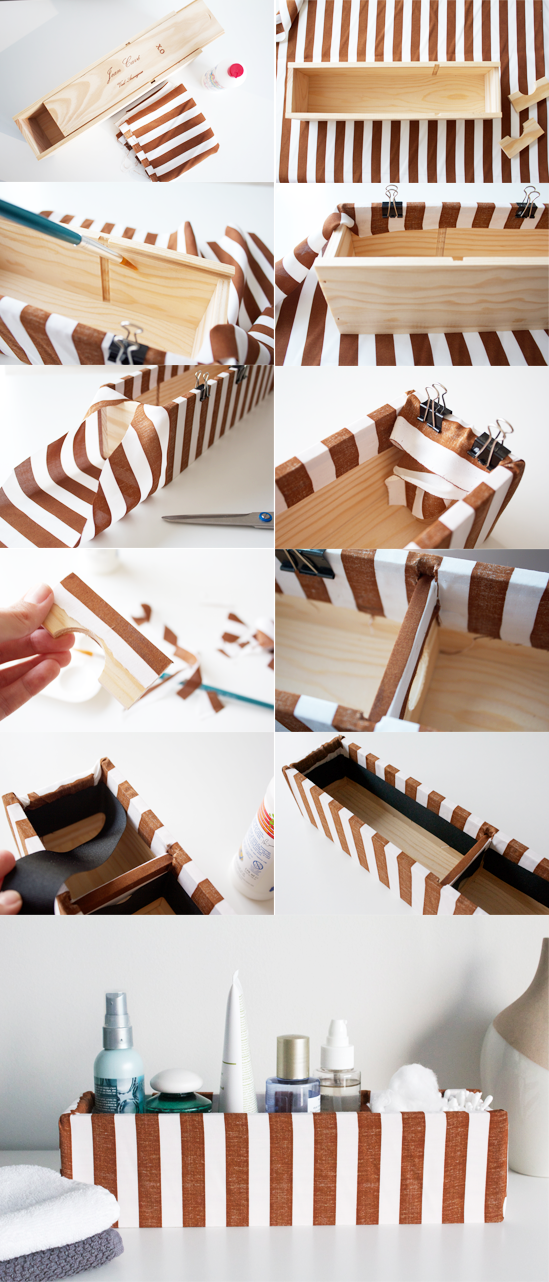
Not too long ago I bought my preferred spirit, armagnac, and it came in fantasticly sturdy wood box. I instantly knew that would make a great storage bin for by bathroom's countertop. The size, the depth, the weight - it had everything going for it except that it needed some personality. I considered painting but decided that wrapping it in fabric would give it more of the polished boutique-y feel I was going for. Don't have a wood box? Depending on the end purpose (how sturdy you want/need it to be) you could use an old shoe box or buy new gift boxes from your local art supplies shop.
The entire process took me less than thirty minutes and the materials were simple: fabric, glue, binder clips, ribbon, and of course, scissors (sorry, forgot some of those in the "supplies" shot!)
Here's the step-by-step:
1. lay the fabric out and place your box in the center just like you would when wrapping a present. cut to size.
2. apply glue to the inside edge (long side first). for best results let it sit and get a bit tacky.
3. stretch one side of the fabric over the edge and press firmly to set it with the glue. use binder clips to help keep the fabric properly in place so you get a smooth and stretched out finish. repeat on the other long side.
4. working on the ends now, get back into "gift wrapping" mode and fold in the sides. cut away any unnecessary fabric, place binder clips and layer glue *over* the fabric in addition to what you'd do in repeating step two. this part of the box will have more bulk in fabric so it will need more glue to set.
5. this may not apply to you if you're not using a liquor case but I glued fabric over the bottle neck supporter, cut slits in the fabric where the insert slot is and voila - i had a nice little divider.
6. glue ribbon along the edge of the interior fabric for a clean finish and you've got yourself a beautiful custom box!
If you think you'd like something a little more resistant to wear and tear, using a PVC coated fabric would be a great way to go.
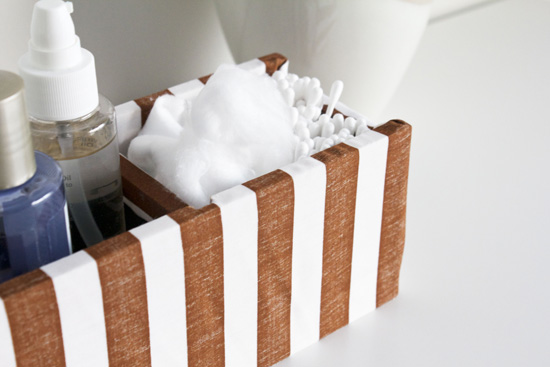
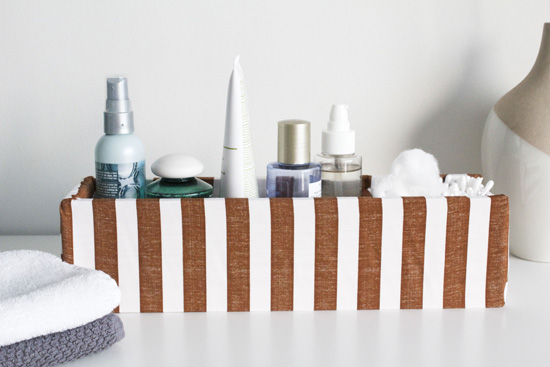
Now, do you have any boxes laying around that might have finally found their calling?
An LA native living in Kuala Lumpur, Malaysia, Ana Maria is a flea market fanatic with a knack (and love) for DIY. She shares her vintage finds in her online shop, The Pond Market, and captures her adventures and inspirations on her personal lifestyle blog, Anamu.


6 comments:
Wow! This looks great, perfect for organizing lipsticks as well. Will defo try this out one day :-)
echocanyon.blogspot.com
so great
xo of Paris
Love it!! :))
glad you enjoyed it! definitely worth a try to make your storage bins a bit more exciting.
So beautiful! What brand of glue did you use?
Emerly - I used standard water-soluble craft glue that I had handy. It surprisingly held up!
Post a Comment